
Electronic mail personalization is sacrosanct. No bible of electronic mail advertising is full with out personalization. 90% of marketers swear that personalization provides majorly to ROI.
The main ESPs available in the market as we speak are kitted out with superior personalization options. Most ESPs provide AI-grafted personalization, which is next-gen.
However if you happen to can’t afford ESP-level personalization simply but, you may nonetheless provide personalised experiences to your electronic mail demographic through mail merge in Outlook. It’s fully free, and it’s the right choice if you happen to personal a comparatively small record of subscribers.
You’ll simply want two extra Microsoft apps, Phrase and Excel, that’s all. We’ll get to the workflow in a bit. First issues first, what precisely is mail merge in Outlook?
What’s mail merge in Outlook?
Mail merge in Outlook is a performance used for sending personalised emails to your viewers. “Merge” refers back to the synthesis of a template doc (from Phrase) and a knowledge supply (from Excel.) The template doc is the e-mail physique. The info supply consists of the data on every recipient in your electronic mail record.
For instance, you compose a welcome electronic mail on Phrase. Now you wish to ship it to 50 subscribers. Outlook “merges” the content material of your welcome electronic mail from Phrase and the recipient information from Excel to create the e-mail correct, able to ship to your contacts.
One other state of affairs: You wish to ship present packages to a choose group of shoppers who received a latest contest as a part of your marketing campaign. You should utilize mail merge in Outlook to create mailing labels, delivery/handle labels with customized information, print them, and stick them onto the packing containers.
Who ought to use mail merge, and when?
Usually, corporations with a comparatively small variety of subscribers use Outlook for sending personalised emails.
However greater manufacturers may use the mail merge characteristic as a part of sure focused campaigns to succeed in a smaller phase of high-value prospects. One may additionally think about complicated inside communications happening through mail merge in Outlook. It may be a part of a model’s electronic mail toolkit, the place Outlook enhances different ESPs. Make no mistake, 64% of Outlook customers are primarily based in the US.
There are a number of limitations that you must take into account when utilizing Outlook for mail merge:
- In case you are a Microsoft 365 subscriber, You might be allowed to ship emails to not more than 5,000 recipients every day, and every electronic mail will be despatched to at most 500 recipients.
- In case you are NOT a subscriber, the sending limits shall be decided on the idea of account status, sending patterns, spam criticism charges, and so forth.
A lot for Outlook-imposed sending limits. Right here’s Microsoft 365’s sending limits:
- You’ll be able to ship emails to 10,000 recipients per day.
- You’ll be able to solely ship 30 emails per minute.
In case you personal a small record, Outlook’s mail merge needs to be your go-to. Now let’s learn to implement mail merge in Outlook with attachments.
Learn extra: The Final Information to Microsoft Outlook Templates
Mail merge in Outlook with attachments: The steps
1. Configure your information and electronic mail in Excel and Phrase
Arrange your Outlook occasion for sending personalised emails:
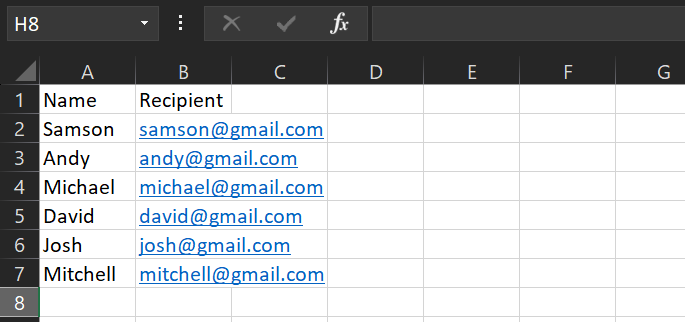
- Go to Excel and configure your information on a brand new Excel spreadsheet, as proven within the following screenshot.
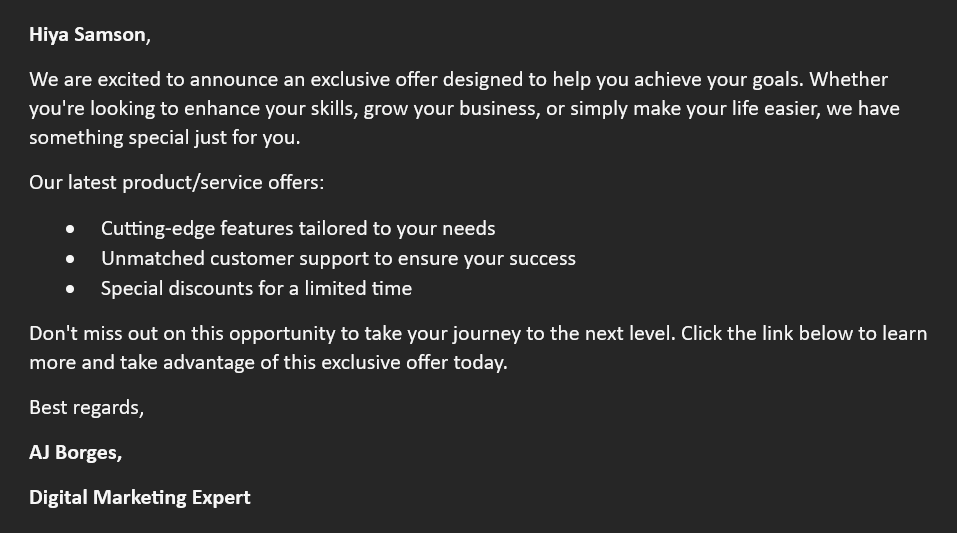
- Save this spreadsheet. Now, open a brand new Phrase doc, and begin drafting your electronic mail physique as proven under.
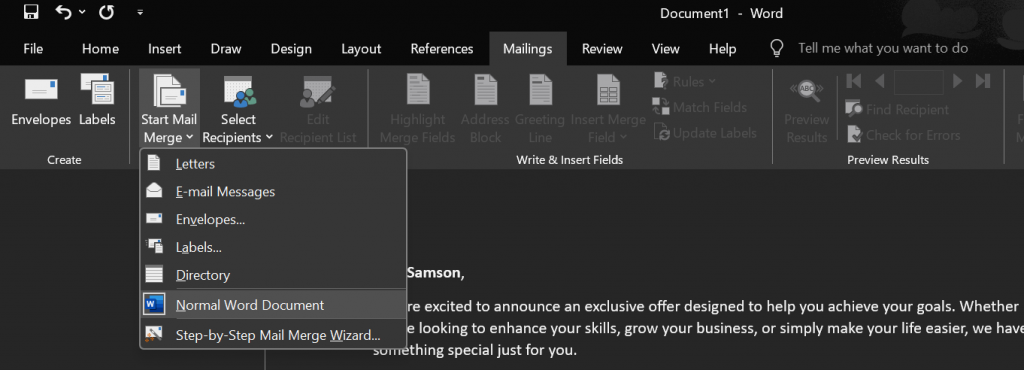
- Subsequent, navigate to Mailings and click on Begin Mail Merge. Choose Regular Phrase Doc.
- Then go to Choose Recipients. Choose Current Record.
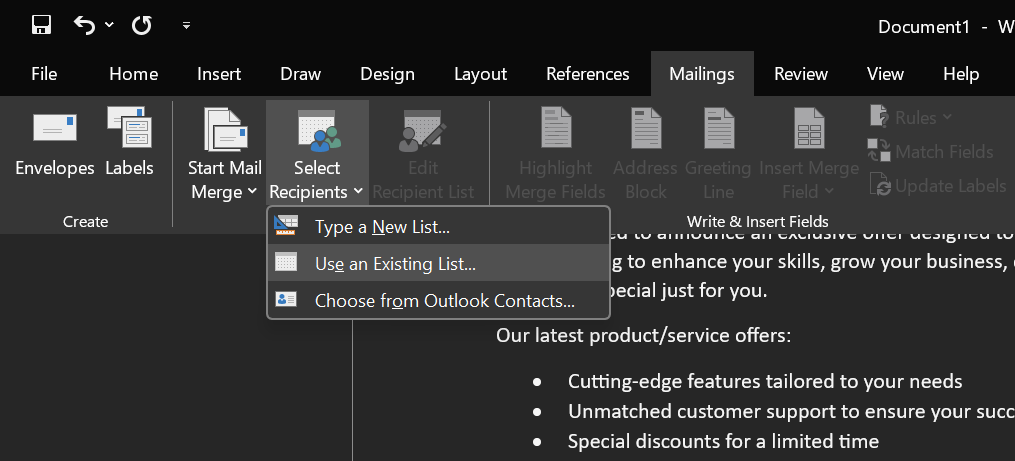
- Now choose the Excel spreadsheet you saved a number of steps again. Click on OK.
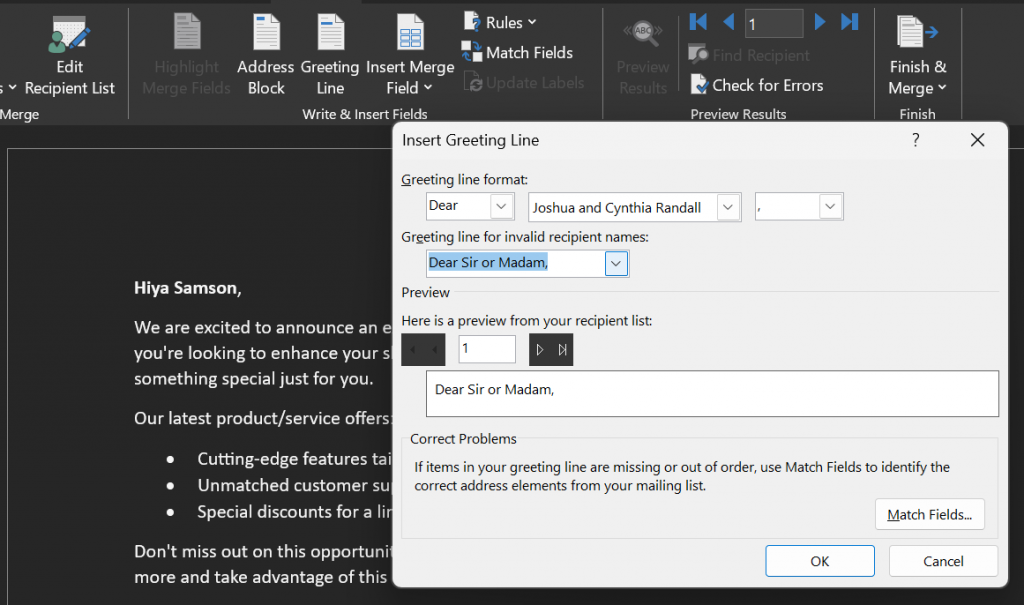
- It is best to see new tabs on the ribbon, equivalent to Handle Block, Greeting Line, and Insert Merge Subject. Choose the primary line of your electronic mail physique, after which choose Greeting Line, as proven right here. Fill the required fields, and click on OK.
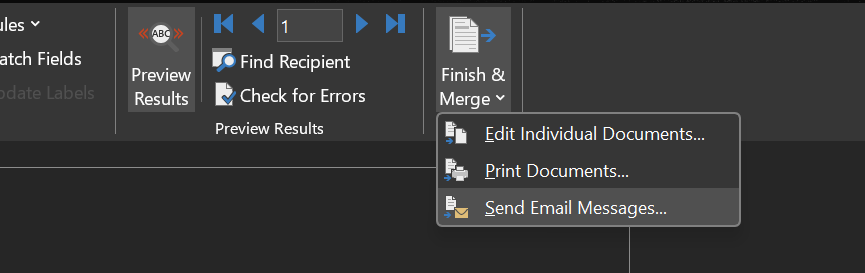
- In case you want, you may preview the brand new electronic mail by clicking Preview Outcomes. When you’re happy with it, navigate to End & Merge. Click on it, and select Ship Electronic mail Messages from the dropdown. Similar to within the following picture.
- The Merge to E-mail popup will seem, asking you to configure the e-mail information. Add the topic line. You’ll be able to select any of the three choices, All, Present Report, or a spread. For the aim of our article, we’ll choose All. Click on OK.
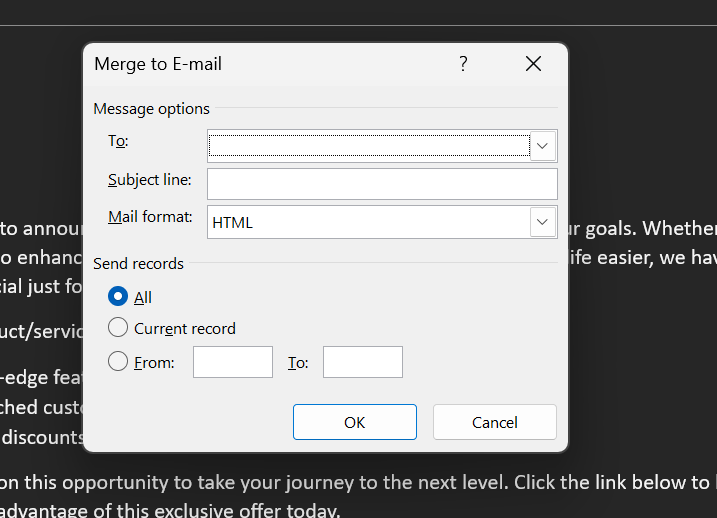
Outlook will now ship your electronic mail to all of the configured recipients within the Excel spreadsheet.
Now you’ll learn to implement mail merge in Outlook with attachments.
2. Obtain the MERGE TOOLS ADD-IN.zip.
Obtain the .zip file here. Why? As a result of the mail merge characteristic in Outlook can’t connect recordsdata to emails by default. Due to this fact, that you must use third-party add-ins which lengthen the mail merge functionalities in Outlook.
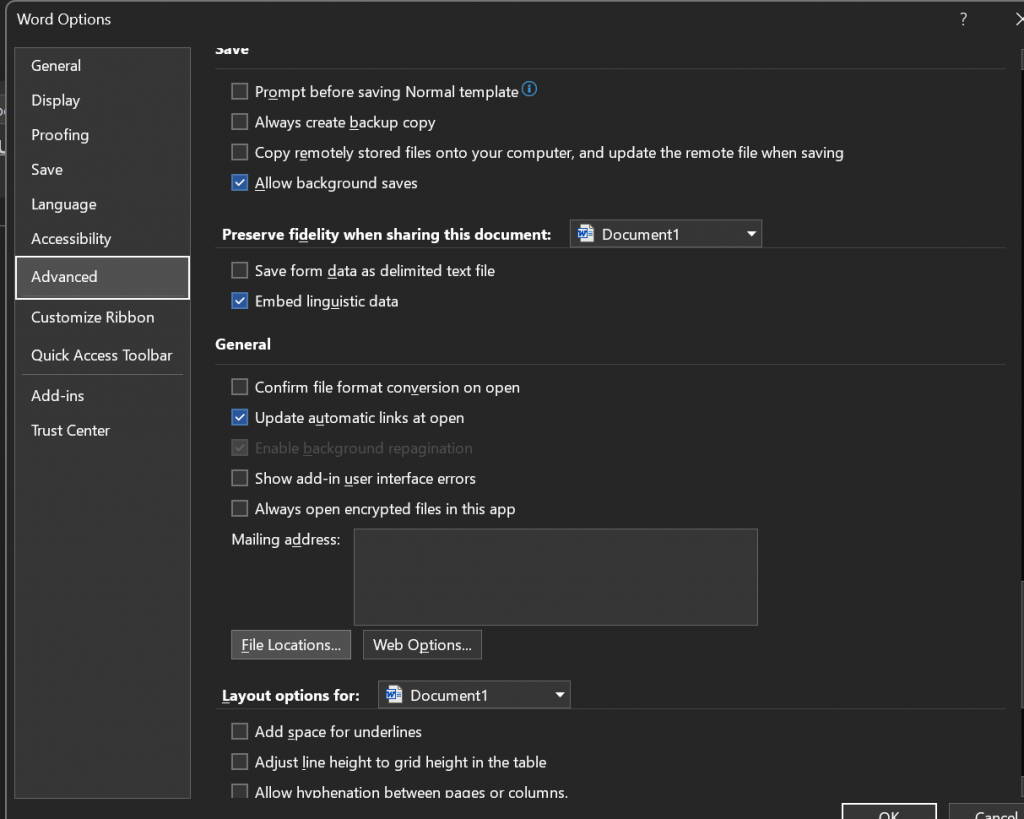
When you obtain the .zip file, pull out the content material. Open a Phrase doc. Navigate to File, and click on Choices as proven within the following seize.

3. Go to File Areas
Navigate to Superior. Choose Normal, and click on File Areas.
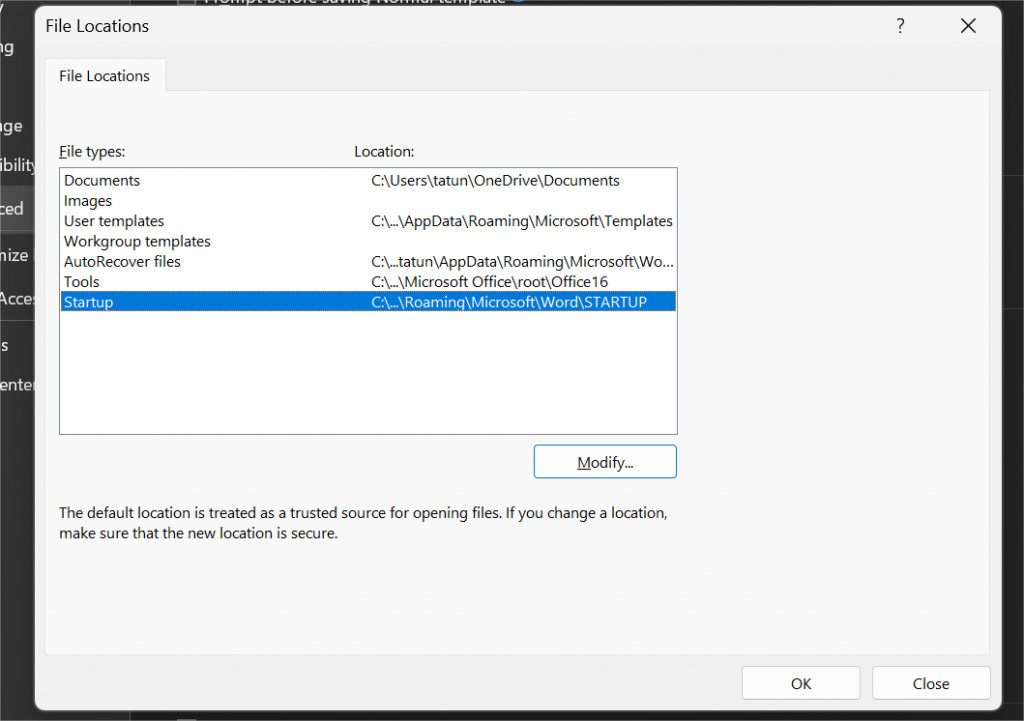
4. Choose ‘Startup’
Within the File Areas dialog field, choose Startup, after which click on Modify. (Startup is the place Phrase shops add-ins. As quickly as you open a brand new Phrase doc, these add-ins are mechanically made accessible.)
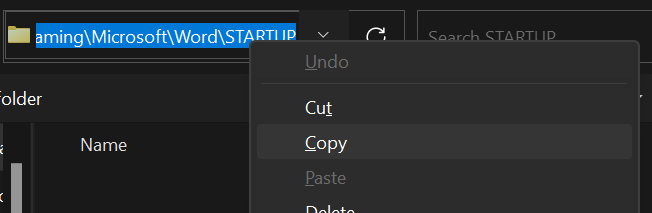
5. Copy the folder handle
Clicking Modify will open the File Explorer from the place that you must copy the handle of the folder the place the downloaded .zip file is situated.
Now open File Explorer as soon as once more, and go to the folder the place the .zip file is situated. Choose the file named MergeTools-2022.
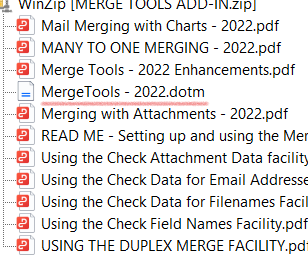
Having saved the file within the Startup folder, you’ve efficiently configured the Merge Instruments add-in into Phrase. Now you’re prepared so as to add attachments.
6. Create ‘Attachments’ column in Excel
You’ll be able to identify this column no matter you need. Keep in mind, we’re speaking in regards to the authentic Excel spreadsheet right here. The brand new column shall be third, alongside the columns for recipient identify and electronic mail handle.

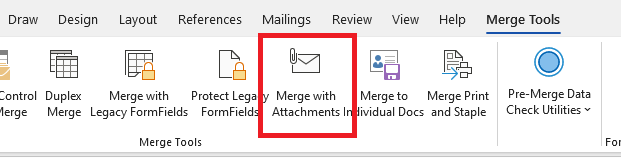
7. Choose Merge with Attachments in Phrase
Open the unique Phrase doc the place you drafted the e-mail physique. Navigate to Merge Instruments, and choose Merge with Attachments as proven within the picture under.
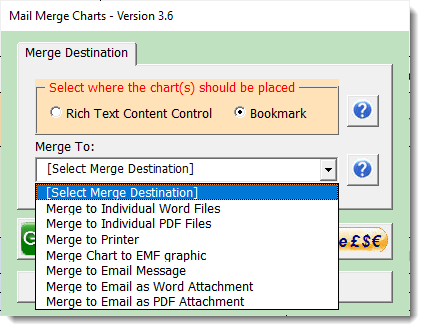
8. Choose ‘Attachments’
On clicking Merge with Attachments, the dropdown will present the Attachments choice. Choose the choice and click on Add. Subsequent, go to the Merge Vacation spot dropdown and choose Merge to Electronic mail Message as proven within the following screenshot.
It is best to subsequent see the Merge to E-mail popup as soon as once more, however this time with further fields for CC and BCC. Fill the remaining fields, select All, and click on OK.
Voila! You might have efficiently configured Outlook to ship your personalised emails with attachments.
Learn extra: Outlook Electronic mail Rendering Points and Hacks to Save the Day
Take Benefit of 5-star ESP Assist!
At Electronic mail Uplers, we deal with all the pieces from electronic mail template integration to ESP migration. Our staff of consultants is educated in over 50 ESPs, making certain seamless transitions and optimum efficiency. As official companions with Salesforce, Mailchimp, Klaviyo, and Braze, we deliver specialised experience to each challenge. Get in contact with us as we speak to take your electronic mail advertising technique up a notch.